> For the complete documentation index, see [llms.txt](https://ledsak.gitbook.io/docs-for-ledsak/llms.txt). Markdown versions of documentation pages are available by appending `.md` to page URLs; this page is available as [Markdown](https://ledsak.gitbook.io/docs-for-ledsak/integrations/tawk.md).
# Tawk
Tawk.to is a free live chat application that lets you monitor and chat with visitors on your website or mobile app. This tool helps improve customer support, engagement, and conversion.
#### Integrate with Ledsak (Tawk.to)
#### **Purpose:** Integrate the Tawk.to live chat widget into the **Ledsak.io** platform to enable real-time customer support and improve user engagement.
### Add Widget for website.
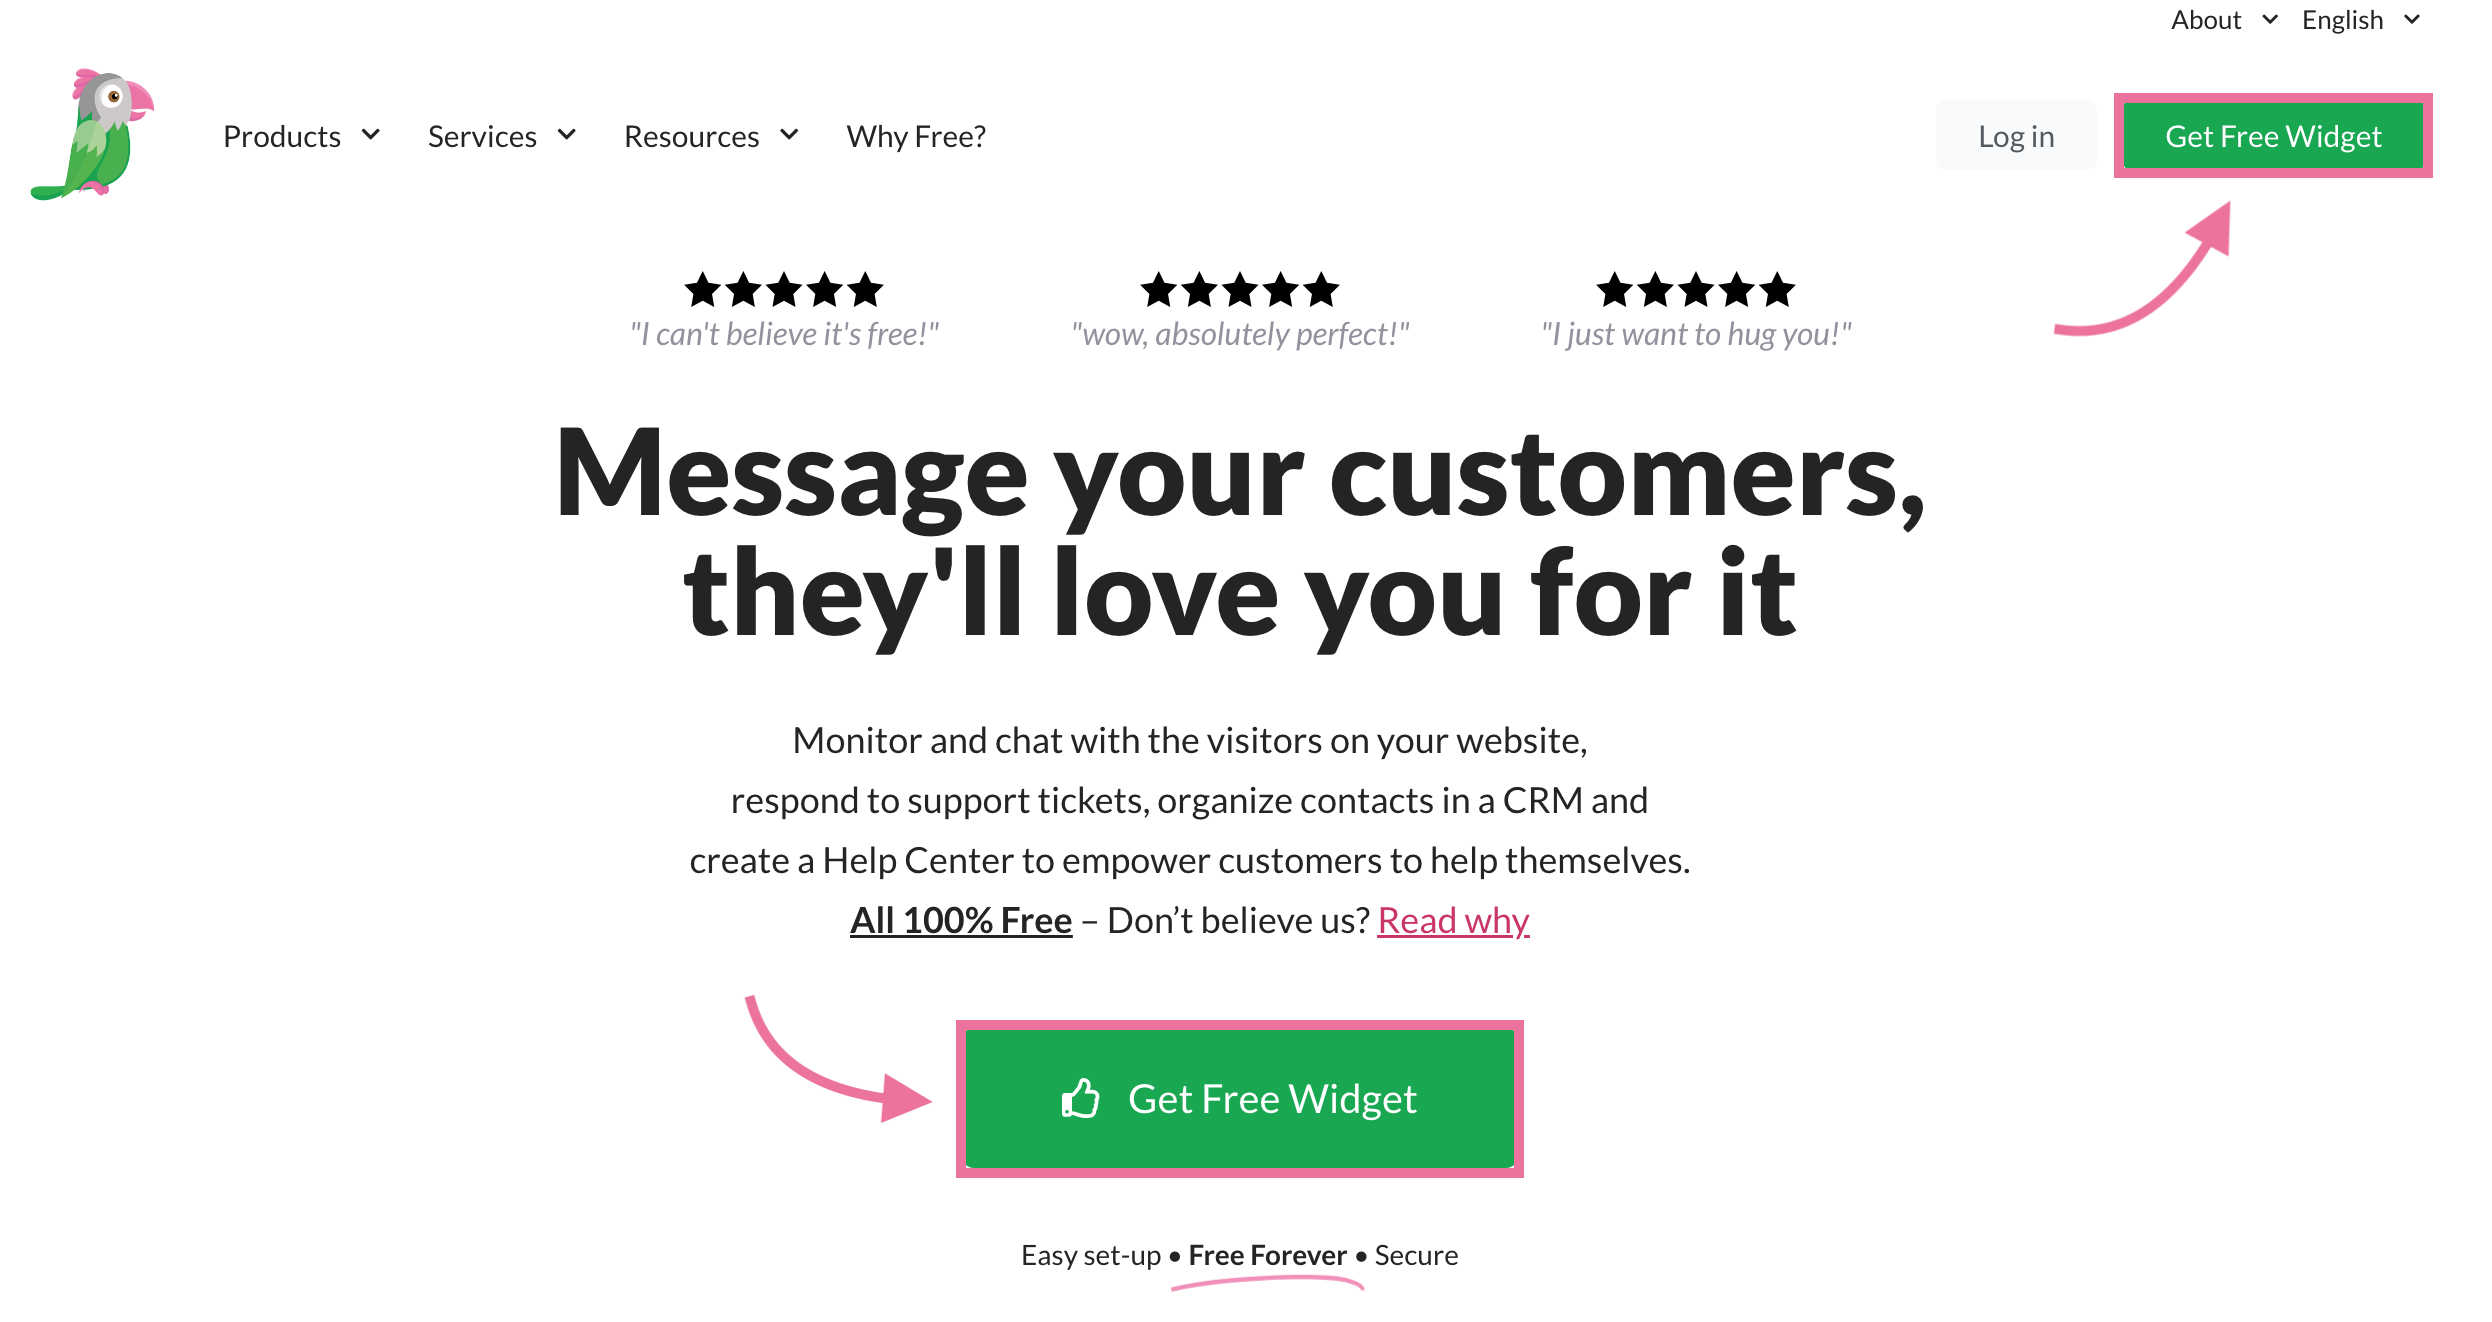
1\. Go to [tawk.to](https://www.tawk.to/) and click Get Free Widget.
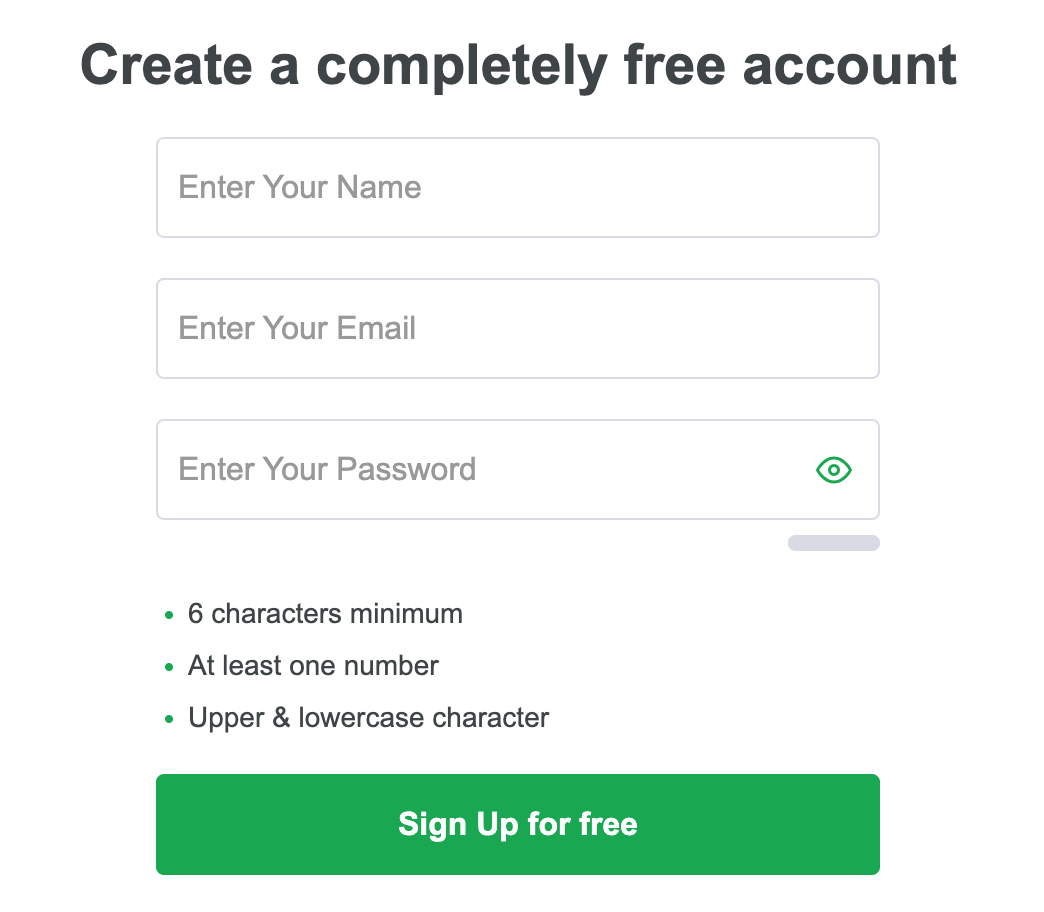
2\. Enter your name, email and password, and click Sign Up for free.
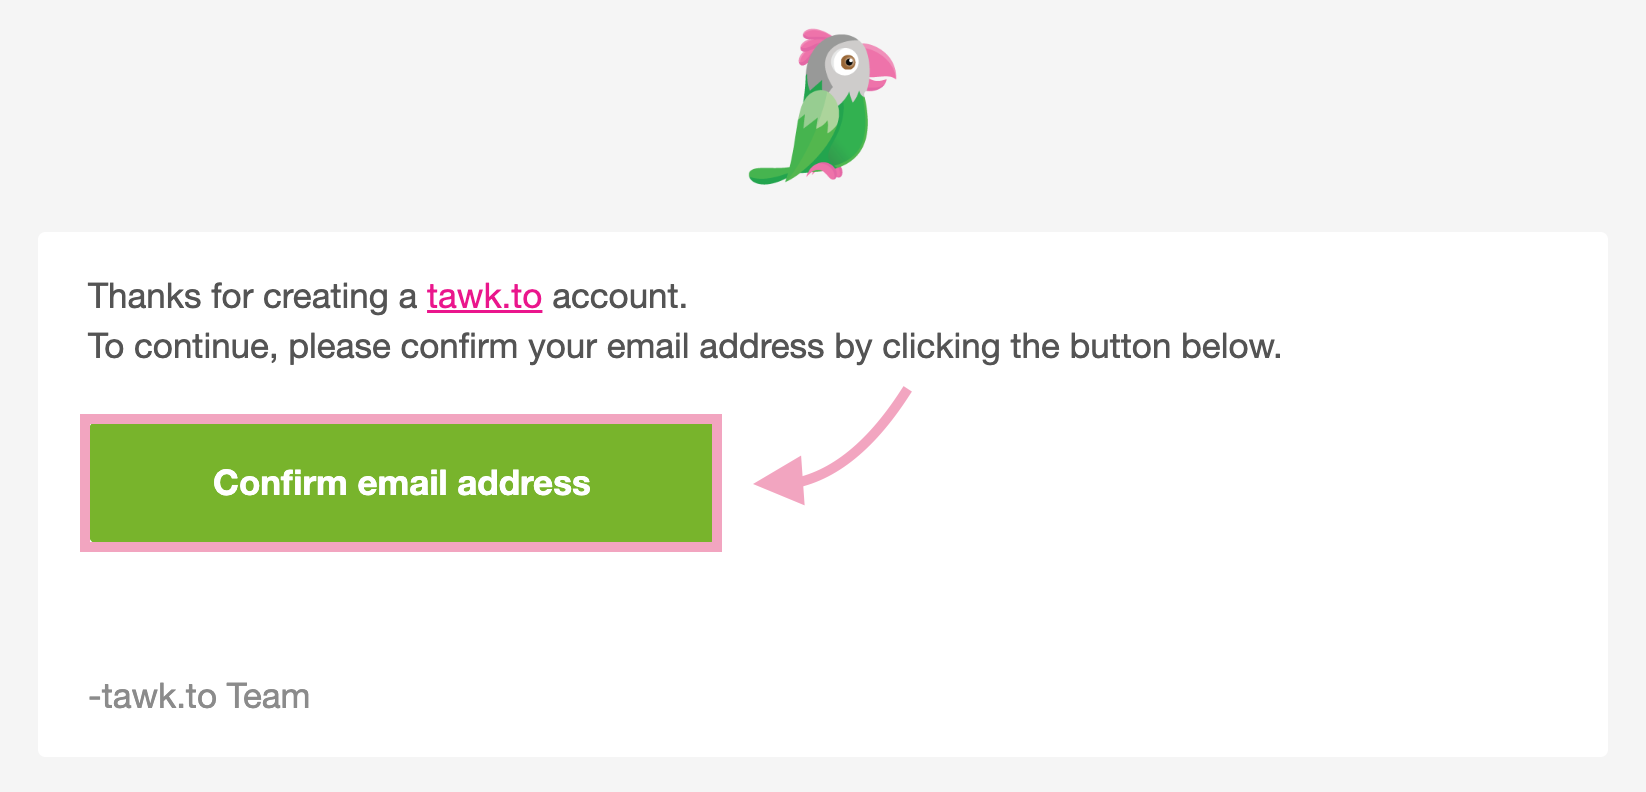
3\. We’ll send you a confirmation email. In the email, click Confirm email address.
4. Click the gear icon on the top menu to go to the Administration panel.
{% embed url="" %}
5. From the Administration menu, select Chat Widget under Channels.
{% embed url="" %}
### Create pre chat from
1. Scroll down to Widget Content and click Edit Content.

2. . The Widget Content settings are on the left of the page, while your widget preview is on the right.

3. Adding the Pre-Chat form\
The Pre-Chat form makes it easy to capture important visitor information before starting a chat. To learn more about using the Pre-Chat form, click [here](https://help.tawk.to/article/using-the-pre-chat-form).\
\
To add the form, select the Pre-Chat tab.

Click Enable Pre-Chat to activate the form.

Then, click + Add to add Header Cards.

For example, you can add an agent’s profile image, a heading, and a text area in the Header, like this:

Next, click + Add to add Body Cards.

Then, select Form.

A form with the default Name and Email fields will appear in the widget preview. \
For example, you can add a text area with a question, like this:
Mandatory to Mapped field one of them (Name, Email, Phone).

Then, click Update. The changes to your widget are effective immediately. No need to update the widget code in your page’s HTML.
### Creating a webhook
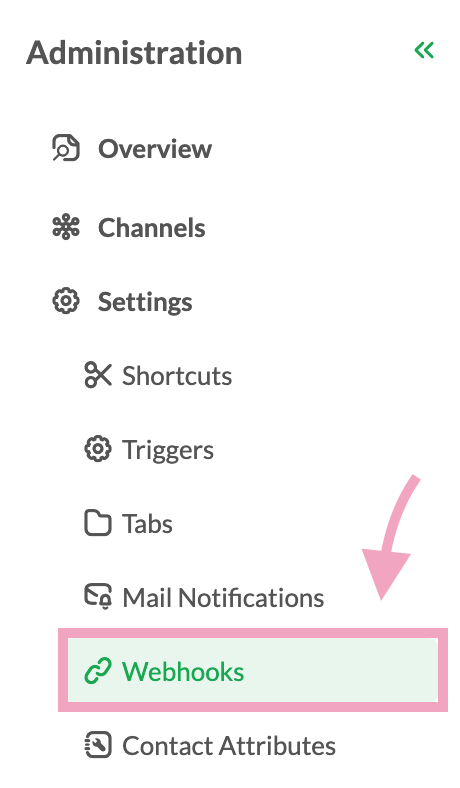
1. Click the gear icon on the top menu to go to the Administration panel.

2. On the Administration menu, select Webhooks under Settings.
3\. Click Create Webhook.
Note: You can have up to 10 webhooks per property.

4. Config the webhook with ledsak.
{% embed url="" %}
5. How to Get Ledsak Enpoint URL.
Go To Ledsak Integration> click to Tawk connect> click to copy Webhook URL.
{% embed url="" %}
{% embed url="" %}
6. Copy Secret Key Tawk Webhook > Paste into ledsak Webhook Secret Key.
{% embed url="" %}
{% embed url="" %}
7. Source as Tawk> Create a source Tawk> and Save
{% embed url="" %}
8. Finally connect Tawk with ledsak.
{% embed url="" %}
---
# Agent Instructions
This documentation is published with GitBook. GitBook is the documentation platform designed so that both humans and AI agents can read, navigate, and reason over technical content effectively. Learn more at gitbook.com.
## Querying This Documentation
If you need additional information that is not directly available in this page, you can query the documentation dynamically by asking a question.
Perform an HTTP GET request on the current page URL with the `ask` query parameter, and the optional `goal` query parameter:
```
GET https://ledsak.gitbook.io/docs-for-ledsak/integrations/tawk.md?ask=&goal=
```
`ask` is the immediate question: it should be specific, self-contained, and written in natural language.
`goal` is optional and describes the broader end goal you are ultimately trying to accomplish on behalf of the user. GitBook uses it to tailor the answer towards what is most useful for that goal.
The response will contain a direct answer to the question and relevant excerpts and sources from the documentation.
Use this mechanism when the answer is not explicitly present in the current page, you need clarification or additional context, or you want to retrieve related documentation sections.